And then click Next button

*The following SQL statement applies to Oracle database only. You can try other statement according to your database.

To change data format, please click

Select format, and then click OK button
And then click Next.


In today's complex business environment, sharing information on a timely basis across an enterprise has become a major challenge.
GTD Report Server meets this challenge by making it easy to design, publish, and distribute reports in a variety of formats to meet any business need.
This section show you how to build common list view report, you can also build complex template based report, see this page
| Building a simple report |
This section describes using the Report Wizard to create a simple report. For advanced information on the Wizard, please read the following sections
For advanced information on the Wizard, please read the following sections
| New Report |
Please enter the report id and the description of the new report.
The ID should be a text string composed of letters (a-z and A-Z), digits (0-9)
.
The reportid should be unique in a server.
Tip: Click Cancel if you want to discard the changes.
| Select Data Source |
Please choose the datasource, which will be used to verify the sql statement and test the report.
Tip: Click Back to navigate to preceding page
For more information on data source, see Data source manager
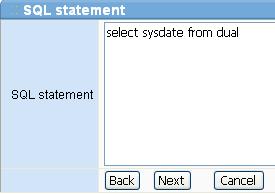
| Enter Query Statement |
You select the data for your report by specifying a query. A query is a SQL statement that retrieves data from a standard datasource.
You can type the query directly in the space provided and then click Next button.
Parameters are variables for your report that users can change at runtime. You can create your own parameters to change values in SQL or PL/SQL at runtime. For example, a parameter could replace single literal values or entire expressions in a query.
You can specify parameter in SQL statement. For example:
SELECT * FROM pet WHERE sex IN ( :sex ) AND height < :height AND birth>:birth_day
The parameter is composed of colon and the name of parameter. The name of parameter is composed of letters (a-z and A-Z), digits (0-9), starts with letter.
The following key words are reserved, they should not be
used as parameter name.
reportid
repticket
datasource
showparamform
setparam
mailto
desformat
nullval
saveto
iszipoutput
submit
gtdlogin
See Options for Running Reports for more
information
You will see the Parameter Setup page if you click next. This page looks simular to this figure.
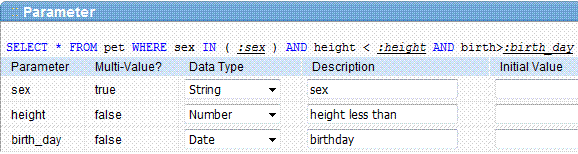
Choose the data type of parameter, enter initial valud if availiable, click Next.
The IN operator allows you to specify multiple values in a WHERE clause. The GTD Server will detect the IN operator if your statement looks like column_name in ( :parameter_name ) .
GTD Server supports 3 data types: numeric types, date and time types, and string (character) types.
You need to specify value of the parameter when you run report. GTD server will use the initial value if you don't specify the value.
Note: Default Date and Time Pattern is
mm/dd/yyyy or MM/DD/YYYY hh:mm:ss
Example: 01/23/2008, 12/03/2007 13:55:43
The id of the parameter is not friendly for common users, you are better off specifying the friendly description of the parameter.
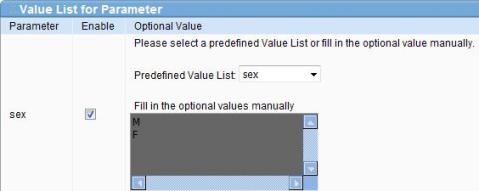
Optional Value List
You can setup the optional value for the paremters. Only value belong to the the list is accepted by GTD Server.
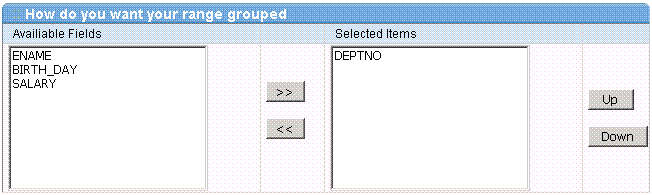
| Grouping |
Select availiable field, and then click arrow button, move the grouping field to right box.
You can also sort the fields using Up and Down button.
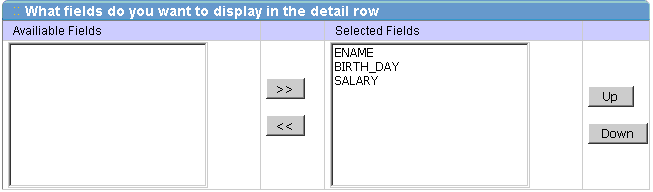
| Choosing fields to be displaied |
Select availiable field, and then click arrow button, move the field to right box.
You can also sort the fields using Up and Down button.
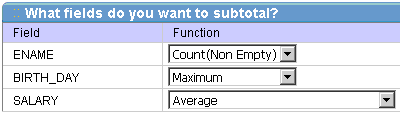
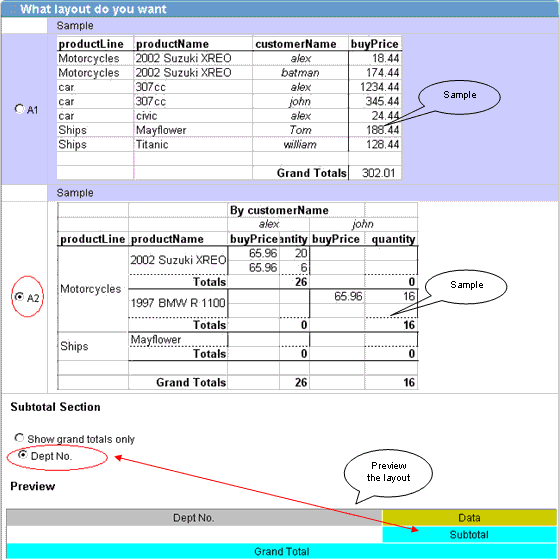
| Subtotals |
| Specifying Labels & Cell Format |
Labels are headings created for each field in a report. Report Builder primes the labels with the column names, but you can change them to suit your needs.
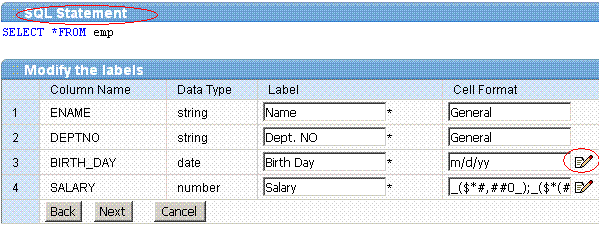
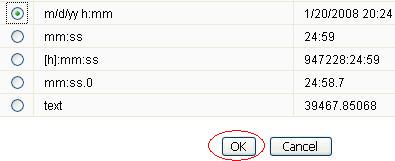
To change Data Format of a cell, click ![]() button.
If the Data Format page appears, choose the desired format,
click OK button
button.
If the Data Format page appears, choose the desired format,
click OK button
Tip: To view the query statement, click the SQL Statement.
| Display |
On the Display page, you can change the format as desired.
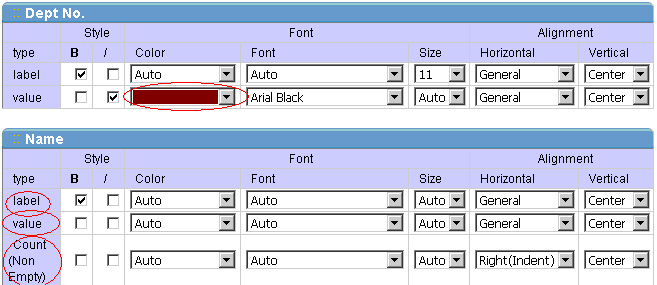
To customize the Font select box, use Font Manager.
| Layouts |
Please select one of predefined layout.
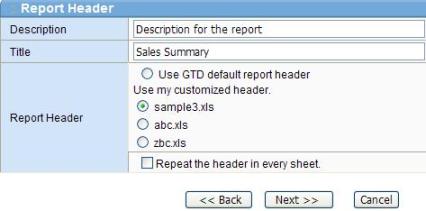
| Report Header |
By default the report header is created by GTD Server, however, you may want to define your own header.
For example, you can insert LOGO of your company to the header of the report.
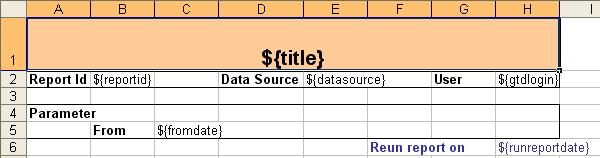
Header Template
In the header template, you can display predefined variable and your customized parameters.
For example, in the sample below, you can see the following variables.
| ${reportid} | Report ID |
| ${datasource} | Data source |
| ${gtdlogin} | The user id |
| ${runreportdate} | When the report is executed. Data type is date, don't forget to format the cell. |
| ${runreportdatestring} | When the report is executed. Data type is string |
| ${fromdate} | Parameter for the report. Data type is date, don't forget to format the cell. |
The file can be download from here
The Header Template file should be put to this folder: ${configDir}/header
Upload Header Template Files
To learn more on uploading file, please read File Manager section
| Report Summary |
This page describes all information on the report.
| Clone Report |
Sometimes you want to create a report based on an existing report, just clone it!
1. Login GTD Server, navigate to Report Manager.
2. Find the report to be clone, click the Clone button.
3. Type the name for the new report, and then edit it via Report Wizard.